
TL;DR:
- Building a data center involves careful planning, site selection, and phased construction to meet workload demands. Early procurement, a strong project team, and active commissioning are essential to avoid delays and costly errors. SMBs often benefit from cloud and colocation services as practical alternatives to full on-site builds.
A step by step data center setup is the structured process of planning, designing, procuring, installing, and commissioning all components needed to create a fully operational facility that meets your IT workload requirements and business goals. The industry term for this process is data center development, and it spans everything from site selection through final handover. Building a data center typically takes 27–72 months, with construction alone running 15–30 months and commissioning adding another 3–6 months. This guide walks IT managers and SMB professionals through every phase, from choosing a site to cutting over to live operations, with real procurement strategies, layout principles, and commissioning checklists built in.
How to select the right site for your data center
Site selection is the single decision that constrains every other choice in your data center build process. Get it wrong and you spend years fighting power limitations, permit delays, or fiber dead zones. Get it right and the rest of the project has a solid foundation.
The core criteria for site selection are power availability, utility relationships, fiber access, and zoning. Power is the most critical variable. A mid-size SMB data center typically requires 1–5 MW of utility power, and many sites simply cannot deliver that capacity without expensive substation upgrades. Establish a direct relationship with the local utility early. Ask specifically about available capacity, lead times for new service, and rate structures for large commercial loads.
Fiber access is equally non-negotiable. Confirm that at least two diverse fiber paths enter the building from different directions. Single-path fiber is a single point of failure, and no amount of redundant hardware compensates for a severed cable outside your building.
Site assessment checklist
Before signing any lease or purchase agreement, verify the following:
- Utility power capacity confirmed in writing from the provider
- Minimum two diverse fiber entry points from separate carriers
- Zoning permits data center or heavy commercial electrical use
- Floor load rating of at least 150–250 lbs per square foot for server rooms
- Proximity to flood plains, flight paths, and industrial hazard zones assessed
- Cooling infrastructure options evaluated (chilled water availability, outdoor air economization potential)
- Local permitting timelines confirmed with the authority having jurisdiction
Once the site is confirmed, translate your IT workload demands into facility capacity numbers. Define your power density per rack in kilowatts. Standard deployments run 5–10 kW per rack, while high-density GPU or AI workloads can exceed 30 kW per rack. Industry best practice mandates defining N+1 redundancy from the project start to avoid costly post-design changes. That means every critical system, including power distribution units, cooling units, and network paths, has at least one backup ready to take over instantly.
Pro Tip: Design your initial layout to occupy only 60–70% of the total floor space. The remaining capacity is not wasted. It is your expansion runway, and retrofitting a full data center to add capacity costs three to five times more than building it in from day one.

How do you assemble the right project team?
The team you build determines whether your data center project finishes on time or stalls in procurement limbo. Most SMB data center projects fail not because of technical problems but because of organizational ones.
The core roles you need are an executive sponsor, a facilities engineer, a network engineer, a procurement lead, and an operations representative. Each role has a distinct function that cannot be absorbed by another without creating gaps.
- Executive sponsor: Has authority to approve budget changes and resolve cross-departmental conflicts without escalation delays
- Facilities engineer: Owns mechanical and electrical design, contractor coordination, and code compliance
- Network engineer: Defines connectivity architecture, redundancy topology, and carrier relationships
- Procurement lead: Manages vendor relationships, purchase orders, and delivery scheduling
- Operations representative: Ensures the facility being built matches how the team will actually run it day to day
Empowered executive sponsors are not optional. Projects without a sponsor who can clear organizational roadblocks consistently run over schedule and over budget. The sponsor does not need to attend every meeting, but they must be reachable for decisions within 24 hours.
Procurement planning deserves its own dedicated focus. Lead times for switchgear, generators, and chillers commonly run 6–18 months, and no amount of additional budget accelerates a manufacturer's production queue. Order these items the moment your design is frozen, not after permits are approved.
Your procurement lead should maintain a master equipment log that tracks every item by order date, expected delivery date, staging location, and installation sequence. This log becomes the heartbeat of your project schedule.
Pro Tip: Pre-configure servers, switches, and storage arrays at a staging facility before they arrive on site. Pre-installation staging catches hardware faults and firmware mismatches early, which means your commissioning phase runs faster and with far fewer surprises.
Step by step guide to data center construction
Physical construction is where the data center installation guide becomes a sequenced choreography. Each phase depends on the previous one being complete and verified. Skipping ahead creates integration failures that are expensive to unwind.
The four construction phases
Phase 1: Site Preparation and Foundation Clear the site, complete soil testing, and pour foundations rated for the mechanical loads your equipment will impose. Concrete curing schedules are among the most controllable factors in your overall timeline. Do not rush them. Undercured concrete under raised floor systems creates long-term structural risk.
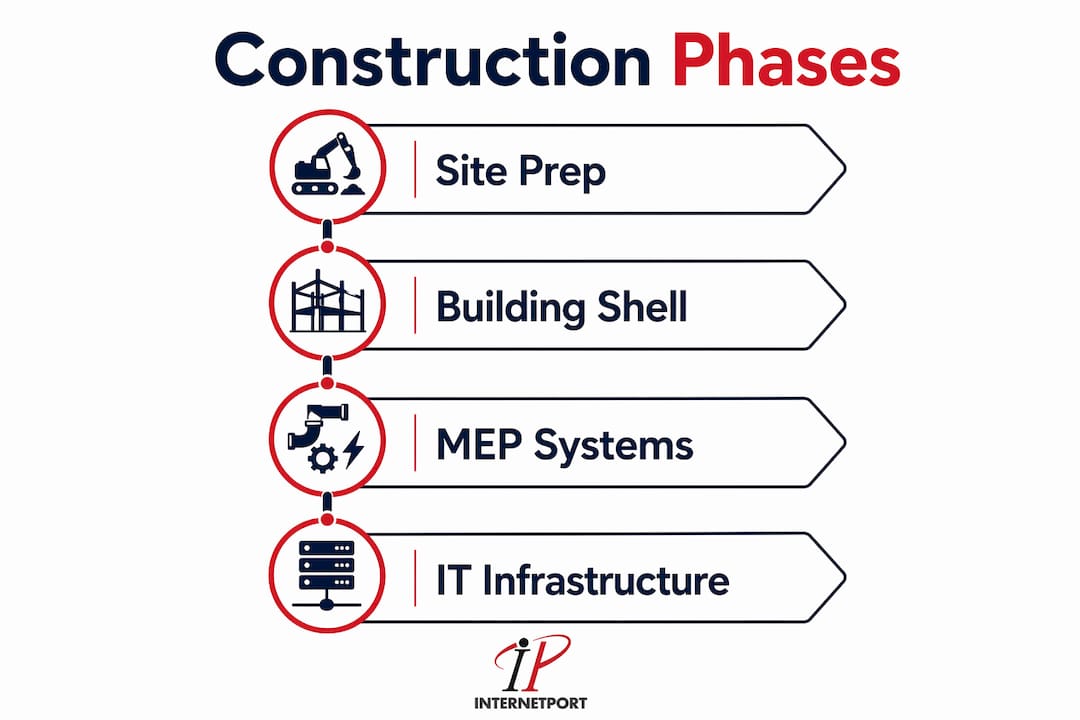
Phase 2: Building Shell and Envelope Erect the structural steel or tilt-up concrete walls, install the roof, and seal the building envelope before any mechanical or electrical work begins indoors. Moisture intrusion during MEP installation causes corrosion and contamination that surfaces months later.
Phase 3: Mechanical, Electrical, and Plumbing (MEP) Systems This is the most complex phase. Install the main switchgear, transformers, UPS systems, generators, and power distribution units. Run the cooling infrastructure, including computer room air handlers (CRAHs), chilled water piping, or direct expansion units depending on your design. Data center installation must be treated as a meticulously choreographed sequence to prevent safety failures and integration errors. Mechanical and electrical integration requires strict documentation and cleanroom protocols.
Phase 4: IT Infrastructure and Cabling Install racks, cable trays, patch panels, and overhead cable management systems. Pull fiber and copper cabling according to your structured cabling plan. Label every cable at both ends before it is terminated. Unlabeled cables are the number one cause of troubleshooting delays during commissioning.
Equipment comparison: cooling approaches
| Cooling Type | Best For | Power Efficiency | Upfront Cost |
|---|---|---|---|
| Computer Room Air Handler (CRAH) | Chilled water plants, large deployments | High | High |
| Computer Room Air Conditioner (CRAC) | Smaller rooms, DX systems | Moderate | Moderate |
| In-row cooling | High-density racks above 15 kW | Very high | High |
| Rear-door heat exchangers | Retrofit high-density situations | High | Moderate |
Numbered installation steps
- Complete structural shell and verify building envelope integrity
- Install main electrical switchgear and transformer
- Install UPS systems and battery cabinets
- Install generators and automatic transfer switches
- Run power distribution to PDU locations
- Install cooling units and connect to chilled water or DX systems
- Install raised floor or overhead cable management infrastructure
- Set racks and bolt to floor anchors
- Pull and label all fiber and copper cabling
- Terminate and test all cabling with a certified cable tester
Pro Tip: Use a data center security checklist to integrate physical access controls, CCTV placement, and biometric readers into the construction drawings before walls are closed. Retrofitting security infrastructure after construction costs significantly more and often compromises the physical design.
What does data center commissioning actually involve?
Commissioning is not a final checklist you run through the week before go-live. Commissioning is an active process that starts the moment mechanical and electrical systems are installed, running in parallel with the later construction phases.
The goal of commissioning is to prove that every system performs to its design specification under real load conditions, including failure scenarios. A system that works perfectly under normal conditions but fails during a simulated power outage is not commissioned. It is a liability.
Commissioning and testing steps
- Verify electrical continuity on all circuits before energizing
- Energize utility feed and confirm switchgear operation
- Test UPS systems under full rated load for a minimum of four hours
- Conduct generator start and transfer tests, including simulated utility failure
- Verify cooling system operation at design airflow and temperature setpoints
- Test fire suppression and detection systems with the local authority having jurisdiction present
- Conduct physical security system tests including access control and CCTV recording
- Run integrated systems test with IT load in place, simulating peak demand
- Execute failover tests for every redundant system pair
- Document all test results and resolve all open items before go-live
Setting a firm go-live date and communicating it to all stakeholders is one of the most underrated factors in a successful cutover. Ambiguity about when the facility goes live creates confusion about who owns what system and when legacy infrastructure can be decommissioned. Pick the date, publish it, and hold it.
Plan for a post-cutover support window of at least 30 days with your primary contractors on call. The first month of live operations surfaces issues that no amount of testing fully predicts. Having the people who built the system available to troubleshoot is worth every dollar of the retainer.
Pro Tip: Run a staged cutover by migrating non-critical workloads first. This validates your monitoring, alerting, and runbook procedures under real conditions before your most sensitive systems are at risk.
How to build a data center setup checklist and layout plan
A data center setup checklist is the document that keeps your project honest. It translates your design intent into verifiable actions at every phase, from site selection through handover documentation.
What your checklist must cover
- Site selection criteria verified and documented
- Power and cooling capacity calculations signed off by a licensed engineer
- N+1 redundancy confirmed for power, cooling, and network paths
- Equipment procurement orders placed with confirmed delivery dates
- Cabling plan drawn and approved before installation begins
- Physical security design integrated into construction drawings
- Commissioning test procedures written and reviewed before testing begins
- Handover documentation package complete, including as-built drawings, equipment manuals, and test reports
Layout planning is where your checklist connects to your physical design. The most common SMB layout mistake is placing racks in a single orientation without a hot aisle and cold aisle arrangement. Hot aisle and cold aisle containment reduces cooling energy consumption by directing cold supply air to server intakes and capturing hot exhaust before it mixes with the room air.
Layout approach comparison
| Layout Type | Pros | Cons |
|---|---|---|
| Hot aisle and cold aisle containment | High cooling efficiency, industry standard | Requires disciplined cable management |
| Open floor plan | Simple to implement initially | Inefficient cooling, higher energy costs |
| Pod-based modular layout | Scales incrementally, isolates failure domains | Higher upfront planning complexity |
| Perimeter cooling only | Low cost for small rooms | Fails above 5 kW per rack density |
Mapping specific workload profiles and planning phased pod deployments is the best practice for SMBs managing capital risk. Build one pod to full specification, validate it, then expand. This approach avoids the trap of building out a full floor only to discover your cooling design cannot handle the actual workload density.
Physical security must be integrated into the layout, not added afterward. Mantrap entries, badge-controlled zones, and CCTV coverage zones should appear on your floor plan at the design stage. Review the colocation setup workflow for a detailed breakdown of how security zoning maps to operational access policies.
Key takeaways
A successful data center build requires early procurement, empowered leadership, and commissioning treated as an active process rather than a final sign-off.
| Point | Details |
|---|---|
| Start procurement immediately | Order switchgear, generators, and chillers the moment design is frozen, not after permits arrive. |
| Define N+1 redundancy at project start | Changing redundancy specifications after design is complete causes expensive rework and schedule delays. |
| Commission in parallel with construction | Begin mechanical and electrical testing as systems are installed, not only at the end of the build. |
| Use hot aisle and cold aisle containment | This layout standard reduces cooling costs and supports higher rack densities as workloads grow. |
| Set and publish a firm go-live date | Ambiguity at cutover directly correlates with deployment failures and operational confusion. |
What i've learned building data centers for smbs
The single biggest mistake I see SMB teams make is treating the data center project as a facilities project with an IT component. It is an IT project with a facilities component. That distinction changes who leads, who decides, and who gets blamed when something goes wrong.
Phased deployments are not a compromise. They are the correct strategy for any organization that cannot predict its workload growth with precision. Build one pod, run it for six months, and let actual utilization data drive your next expansion decision. The teams that insist on building out the full floor on day one almost always end up with either too much stranded capacity or a design that cannot handle the density they actually need.
The procurement timeline is the one thing that will humiliate you if you ignore it. I have watched projects with solid engineering and strong executive support slip by 18 months because a generator was ordered three months too late. The data center redundancy workflow is worth reviewing before you finalize your equipment list, because the redundancy decisions you make in week one determine your procurement list in week two.
Commissioning deserves more respect than most SMB projects give it. A four-hour UPS load test feels like overkill until the UPS fails at hour three and you realize you would have discovered that failure during a production outage instead. Test everything. Test it under load. Test it failing. The cost of a thorough commissioning program is a fraction of the cost of a single unplanned outage in a live facility.
— Peter
Not ready to build? Internetport has you covered
Not every SMB needs to build a full data center from the ground up. For organizations that need enterprise-grade infrastructure without the 27–72 month build timeline, Internetport offers dedicated servers, cloud VPS, and colocation services from PCI DSS-compliant facilities in Sweden and internationally. Whether you need a single Dell PowerEdge server or a full colocation rack with private networking, Internetport delivers the performance and support that SMB IT teams require without the capital risk of a ground-up build.
Internetport's web hosting and cloud solutions also work as a complement to an onsite data center, handling burst workloads or disaster recovery while your physical facility handles core operations. Talk to the Internetport team to find the right configuration for your infrastructure needs.
FAQ
How long does a data center build take?
Building a data center typically takes 27–72 months, with construction running 15–30 months and commissioning adding 3–6 months. SMB projects at the smaller end of the scale can complete faster, but procurement lead times for critical equipment remain a fixed constraint regardless of project size.
What is n+1 redundancy in a data center?
N+1 redundancy means every critical system has one backup unit available beyond the minimum required to run the load. Defining N+1 from project start prevents costly redesigns and is the baseline standard for any facility targeting high availability.
Why do data center projects go over schedule?
Procurement lead times of 6–18 months for switchgear, generators, and chillers are the most common cause of schedule overruns. Ordering critical equipment before permits are finalized is the most effective way to protect your timeline.
What is the most important step in data center commissioning?
Integrated systems testing under full load, including simulated failure scenarios, is the most critical commissioning step. A firm go-live date communicated to all stakeholders is equally critical to prevent operational confusion during cutover.
Can an SMB use cloud services instead of building a data center?
Cloud and colocation services from providers like Internetport are a practical alternative for SMBs that need enterprise infrastructure without the capital and timeline of a ground-up build. Hybrid approaches, where onsite hardware handles core workloads and cloud handles burst or recovery, are common and cost-effective for organizations in the 50–500 employee range.