TL;DR:
- The colocation onboarding process involves carefully planning, installing, and validating IT infrastructure in a data center. Proper preparation, including detailed hardware inventories and buffer planning for power and bandwidth, ensures a smooth setup. Avoid common pitfalls by maintaining updated documentation, reviewing contracts thoroughly, and ordering surplus cross-connect strands upfront to prevent delays.
The colocation onboarding process is the methodical sequence of planning, executing, and validating the deployment of your IT infrastructure into a third-party data center facility. Industry professionals call this "data center onboarding," and it covers everything from initial requirements gathering to post-migration validation. Done right, it produces a secure, resilient infrastructure with predictable uptime and clear operational ownership. Done wrong, it produces circuit overloads, contract disputes, and emergency downtime. This guide walks IT managers and decision-makers through every phase, with specific tools, named best practices, and hard lessons that most colocation setup guides skip entirely.
What are the essential prerequisites for colocation onboarding?
Prerequisites define whether your onboarding succeeds or fails before a single rack gets bolted down. The colocation onboarding process starts with a complete hardware inventory: every server, switch, patch panel, cable management arm, and power distribution unit must be documented with model numbers, dimensions in rack units (U), and weight. Missing one accessory at this stage causes delays measured in days, not hours.

Power planning is where most SMB IT teams underestimate their needs. Planning 20–30% headroom above your measured peak power draw prevents thermal shutdowns and tripped breakers during traffic spikes. That buffer is not conservative padding. It is the difference between a stable facility and an emergency call at 2 a.m. Calculate your peak draw in kilowatts per rack, then add that buffer before signing any power circuit agreement.
Network capacity planning follows the same logic. Estimate your peak bandwidth needs, account for burst traffic, and factor in cross-connect costs between your cage and upstream carriers. Cross-connects are physical fiber or copper connections between your equipment and the facility's network infrastructure. They carry lead times of days to weeks and cost structures that vary significantly by provider. Ignoring them at the planning stage is one of the most common and expensive mistakes in colocation service integration.
Contract terms deserve the same scrutiny as physical specs. Auditing billing models, support scope, and renewal clauses is as critical as evaluating the physical data center. Providers vary widely on what counts as a billable remote hands event, what uptime SLA applies to your specific circuit type, and whether your contract auto-renews on unfavorable terms.
| Requirement | Recommended buffer or action |
|---|---|
| Rack space (U) | Add 20% spare U for future hardware |
| Power draw (kW) | Plan 20–30% above measured peak |
| Bandwidth capacity | Add 20–30% above peak traffic estimate |
| Cross-connect strands | Order surplus strands at initial setup |
| Contract review | Audit billing, SLA, support scope, and renewal terms |
Pro Tip: Treat your requirements documentation as a living file, not a one-time deliverable. Update rack maps, power maps, and network diagrams immediately after every change. Static documentation becomes a liability within weeks of go-live.
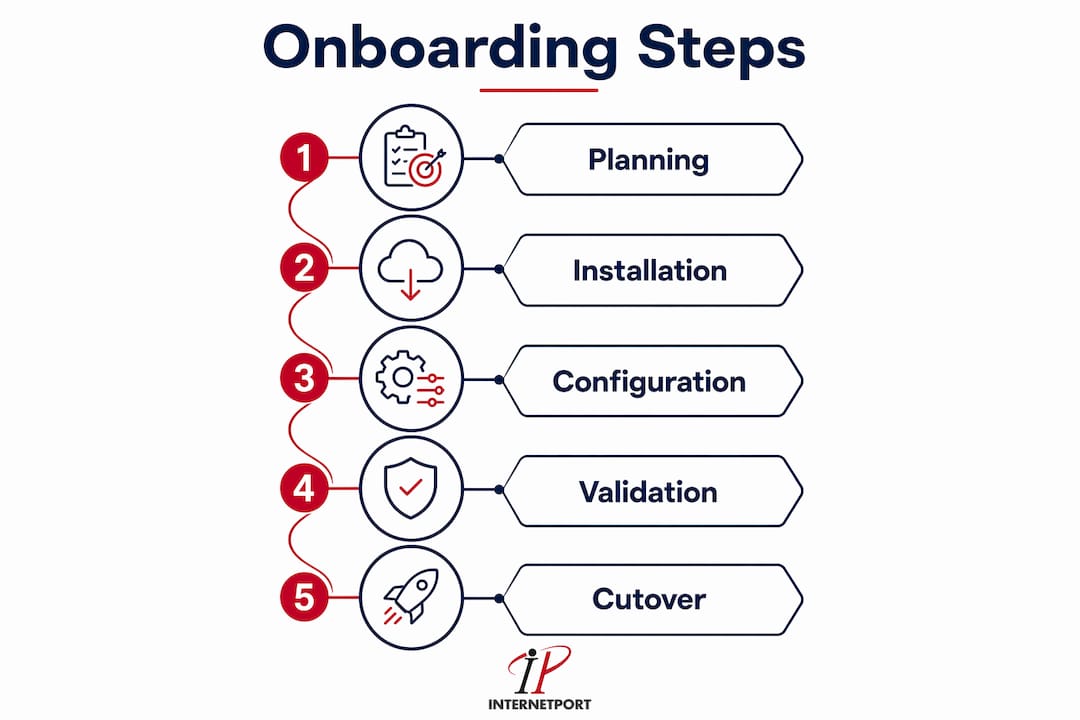
How does the step-by-step colocation onboarding process unfold?
The operational workflow for data center onboarding follows a fixed sequence. Skipping steps or running them in parallel without coordination is the primary cause of configuration errors that take weeks to untangle.
-
Rack allocation and site survey. Confirm your assigned cage or cabinet location, physical dimensions, power circuit labels, and cooling airflow direction before any hardware ships. Walk the floor with your provider contact and photograph everything.
-
Hardware receiving and inspection. Verify every item against your inventory list at the loading dock. Shipping damage to servers is more common than most IT teams expect. Document any damage before signing the delivery receipt.
-
Rack installation. Mount equipment following your rack map, with heavier hardware at the bottom for stability. Install cable management arms and blanking panels in empty U slots to maintain proper airflow.
-
Structured cabling. Use color-coded cabling to separate management, production, and storage networks. Color coding is not cosmetic. It cuts troubleshooting time dramatically when you are tracing a fault under pressure. Patch panels should be labeled at both ends before any cable is terminated.
-
Out-of-band management configuration. Configure IPMI, iLO (HP), or iDRAC (Dell) interfaces first, before bringing up production networks. Out-of-band management gives you remote access to servers even when the operating system is unresponsive. This step is non-negotiable for any SMB without 24/7 on-site staff.
-
Network bring-up sequence. Activate the management LAN first, verify connectivity to all devices, then bring up production networks. Validate routing, firewall rules, and VLAN assignments at each step before proceeding.
-
Validation testing. Run load tests to confirm power draw stays within planned limits. Simulate failover scenarios to verify redundant paths. Test connectivity from external networks and confirm DNS resolution. Document every test result with a timestamp and a named sign-off.
Ordering surplus fiber cross-connect strands at initial setup reduces future cabling costs and decreases provisioning delays. For example, ordering 12 strands for a single cabinet costs marginally more upfront but eliminates a 2-to-4-week provisioning delay when you expand capacity six months later.
Pro Tip: Order more fiber cross-connect strands than you need today. The incremental cost at initial setup is small. The cost of a provisioning delay during a capacity expansion is not.
What are the common pitfalls during colocation onboarding?
Most colocation onboarding failures trace back to the same five mistakes. Recognizing them before you start is the fastest way to avoid them.
-
Underestimating power headroom. Teams calculate average power draw and use that as their circuit size. Peak draw during backup jobs, batch processing, or traffic spikes can exceed average draw by 40% or more. Planning 20–30% headroom above peak prevents tripped breakers and thermal shutdowns.
-
Ignoring contract specifics. Assuming that uptime goals and security controls are standard across providers is a costly error. Detailed contract audits prevent billing surprises, undefined support boundaries, and unfavorable auto-renewal terms.
-
Treating documentation as a one-time task. Runbooks and IP assignments drift from reality within weeks if they are not updated after every change. Living documentation prevents accumulated technical debt that makes troubleshooting exponentially harder over time.
-
Skipping privacy and telemetry controls. Onboarding teams focus on connectivity and miss the logging and telemetry configuration entirely. Integrating privacy preferences into the onboarding pipeline as configuration values from day one reduces audit disputes and accelerates compliance reviews later.
-
Overlooking cross-connect lead times. Cross-connects between your cage and upstream carriers carry lead times that can stretch to several weeks. Failing to order them before hardware arrives means your equipment sits in a rack with no external connectivity.
The mitigation for all five pitfalls is the same: use a weighted provider checklist that scores each provider and contract against your specific non-negotiables, including compliance requirements, latency targets, support response times, and power density limits. No two SMBs share identical priorities, so a generic checklist misses the criteria that matter most to your environment.
How to plan a phased migration and cutover for colocation?
Phased migration is the standard approach for any SMB moving production workloads to a colocation facility. The core principle is simple: migrate non-critical systems first, validate them fully, then move production systems with a tested fallback plan in place.
Small colocation deployments typically onboard within weeks; large or complex migrations can take several months. That range reflects the difference between moving a handful of servers and relocating a multi-tier application stack with database dependencies, compliance requirements, and zero-downtime SLAs.
Establish network connectivity before hardware arrives. BGP announcements, IP address management, and DNS changes take time to propagate and require coordination with your upstream providers. Running these activities in parallel with physical installation compresses the overall timeline without increasing risk.
The parallel run period is the most underused safety mechanism in colocation migration steps. Operating both your old environment and the new colocation environment simultaneously for a defined period gives you a live fallback if the new environment fails validation. The length of that parallel run should match the criticality of the systems involved.
| System criticality | Recommended parallel run | Risk level without parallel run |
|---|---|---|
| Non-critical / dev systems | 1–3 days | Low |
| Internal business applications | 1–2 weeks | Medium |
| Customer-facing production systems | 2–4 weeks | High |
| Regulated or compliance-bound systems | 4+ weeks | Very high |
Document every cutover milestone with a named approver and a timestamp. Organizational alignment on go/no-go decisions prevents the most common migration failure mode: one team declares success while another team's dependencies are still broken. A step-by-step migration guide helps structure these milestones clearly.
Key Takeaways
A successful colocation onboarding process requires documented prerequisites, a fixed operational sequence, a phased migration plan, and living documentation maintained after every change.
| Point | Details |
|---|---|
| Plan power with headroom | Add 20–30% above peak draw to prevent circuit overloads and thermal shutdowns. |
| Audit contracts before signing | Review billing triggers, support scope, and renewal clauses to avoid costly surprises. |
| Follow a fixed onboarding sequence | Configure out-of-band management first, then production networks, then validate each step. |
| Use phased migration with parallel runs | Keep old and new environments live simultaneously to maintain a tested fallback. |
| Maintain living documentation | Update runbooks and IP assignments immediately after every change to prevent technical debt. |
What I've learned from watching colocation onboarding go wrong
The most expensive colocation mistakes I've seen share one trait: they were predictable. Power overloads, contract disputes, and documentation gaps are not bad luck. They are the result of treating onboarding as a one-time project rather than an ongoing operational discipline.
The documentation point deserves more emphasis than most guides give it. Teams spend weeks building detailed rack maps and network diagrams for go-live, then make three changes in the first month without updating anything. Six months later, the documentation describes a facility that no longer exists. Troubleshooting a network fault against outdated diagrams adds hours to every incident.
Privacy and telemetry configuration is the other area that gets consistently deprioritized. Most IT teams treat it as a compliance checkbox to handle after go-live. That approach creates real problems when an audit arrives and log retention settings do not match the policy you documented. Configuring telemetry and log retention preferences during onboarding, not after, is one of the highest-value low-effort steps in the entire process.
The providers that work best as long-term partners are the ones who treat your onboarding as the start of a relationship, not the end of a sales cycle. Ask your provider directly how they handle remote hands requests, what their escalation path looks like for power incidents, and whether their support team can read your rack diagrams. The answers tell you more about the real service level than any SLA document. For context on why colocation supports security and reliability, the fundamentals have not changed even as the tooling has improved.
— Peter
Internetport colocation: built for SMB IT teams
Internetport offers colocation server solutions designed for SMBs that need physical control over their hardware without the overhead of running their own data center. Facilities in Sweden and internationally provide high availability, PCI DSS compliance, and flexible connectivity options including private networking.
Remote hands support means your team is not required on-site for every hardware task. Competitive contracts with transparent billing remove the guesswork from cost planning. Whether you are moving a single cabinet or planning a multi-rack deployment, Internetport's team provides technical guidance through every phase of your onboarding. Explore the colocation server page to review service details or start a conversation about your specific infrastructure requirements.
FAQ
What is the colocation onboarding process?
The colocation onboarding process is the structured sequence of planning, installing, configuring, and validating IT hardware in a third-party data center. It covers requirements gathering, rack installation, network bring-up, and post-migration testing.
How long does data center onboarding take?
Small colocation deployments typically complete within weeks, while large or complex migrations can take several months. Timeline depends on hardware volume, network complexity, and compliance requirements.
What power headroom should I plan for in colocation?
Plan 20–30% above your measured peak power draw. That buffer prevents tripped breakers and thermal shutdowns during traffic spikes or batch processing peaks.
What are the biggest mistakes in colocation migration steps?
The five most common mistakes are underestimating power headroom, ignoring contract specifics, treating documentation as static, skipping privacy and telemetry configuration, and overlooking cross-connect lead times.
How do I choose the right colocation provider?
Score providers against a weighted checklist that reflects your specific priorities, including compliance requirements, latency targets, support response times, and power density limits. Generic checklists miss the criteria that matter most to your environment.